I'm in April's Crafts Beautiful

Sunday 30 March 2014

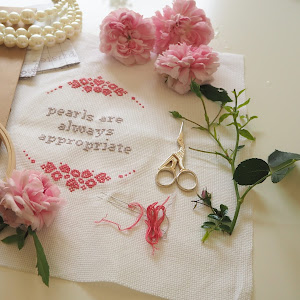
How exciting to find out that my vintage tips are featured in this months Crafts Beautiful magazine!

I love Crafts Beautiful, I have grown up with the magazine; in my crafting bag, then on my desk and now next to my little one's baby books. Every month you can always find inspiration on different handicrafts you never though of trying out.

For me, in this months free pull out, they teach you how to knot your own bracelets and add the free charms which are cover mounted to the magazine. I would never of through of trying this out and it's on my crafty 'to-do' list for the week. The charms are both wooden and metal and very pretty...

Subscription Gift

So it's a big thank-you Crafts Beautiful!

BBFN,

My #IReloveYou Dress

Happy Mothers Day to all UK readers!

If you are a Mummy, today is the day to put on a lovely frock and celebrate all things Mummy! And that it just what I did with my bouncy new hair cut to top it off.

I took part in the #IReloveYou project back in February. I know the brief was to make something upcycled for the home but I had this dress I picked up in a charity shop and it was calling out! It was a type of kaftan with long bell shaped sleeves and cream trimmed edge. I had never re-cut an item of clothing so it was a challenge. I love something new and different but this was a little demanding...but fun!The silk fabric was gorgeous and when I saw it was 100% silk, I couldn't put it down. I have never upcycled something from a charity shop so this is my first go.

The first thing I did was to cut off the bell shaped sleeves (pic bottom left), then take off all the trimming. I then re-cut the sleeves into the right and left front panels of the dress. These I used bias binding to finish the front facing to make a flat professional finish on the facing and empire line seam.

I then used the same black satin bias binding to finish the arm holes so they lay flat when worn as I don't have enough fabric to face the bodice. I did try out a cap sleeve but it didn't look right. So out it came! The sleeveless dress will be fab for lunches as the weather improves. The back had some double darts in the back to shape it but without a zip it needed to be big enough to get on.

I did try and get a photo with me in the dress but my little girl insisted on being in the photo, so here is the front and below, her I am with photo-bombing Little L and some of our Wedding anniversary roses...still in bloom!


I have to say, the project was really a joy to make. The unpicking took forever and re-cutting meant it frayed - A LOT!! But now I have a beautiful silk dotty dress for the price of a fiver plus a bit of satin bias binding.

Really inspired by my first upcycling challenge. If you hear of anymore, I would love to take them on!

Happy Sewing,


How I Get The Best From Velvets - a sewing post

Tuesday 25 March 2014
Chateaux Style Curtains...super posh!
I love stitching luxurious fabrics, it gives that extra special finish to your work. Over the years I have used silks, jacquards and of course velvet!

After last week's Great British Sewing Bee I was asked over on twitter to share my experiences of working with velvets.

Velvet's come in a variety of weights from dress making to furnishing weights and some are heavy, heavy, heavy. Great for a work out on those arms!

Here are my tips....

  • The best way to get the best from your fabric is to drape it in the shop first to check the weight and feel. I did this when buying the green velvet for the curtains in the piccie. These were HEAVY and just what we wanted for our patio doors!!
  • Always check your fabric for the amount to buy including nap. This is the right way your fabric should hang. If you brush up your fabric you will see the pile change colour. Make sure that you buy enough to ensure your nap runs the same way on all pieces. It usually tells you on a commercial pattern. It would be awful if you sew a dress, which when you wear it, it goes a different colour from panel! Nap is the secret!
  • Press, press, press! always with a pressing cloth. When you make up your velvet..to protect the nap, press with a cloth.
  •  Be care with your stitches as the unpicking can look very messy. I always steam any unpicking before I stitch again.

And my last one...It will fray as the velvet pile when cut does make a mess. Keep your work area tidy!! Saying that velvet is so worth the effort.

Velvet I truly love you. 

Cannot wait for tonight's Sewing Bee..it's Vintage. Whoop!

BBFN,

Samantha x

Four Years On From Our Vintage Wedding...and some tips for Brides-to-be!

Saturday 22 March 2014

I love looking at old photo's of our Wedding day! On Thursday our Wedding Anniversary, we got out the pictures to have a look at, for well.., old times sake! 

After four years, the overall excitement and enjoyment of the day hasn't faded. We both loved it so much, it went too fast and was a total mix of emotions which we were both were not expecting. Family, friends old and new being so kind and caring to the both of us.

We planned the Wedding in just six months for a party of 120. It is possible, it was a lot of hard work, late nights and weekends. To be honest we had no time for re-thinking anything, but just went with everything we agreed on. As a happy crafter, I have written on the blog before about the dress I made, the flowers I put together and planning your stationery.

Sadly Pinterest was not yet widely available in 2010, but after I discovered Martha Stewart Weddings on a business trip to L.A. everything fell into place. Martha was a life saver!

I would never put anyone off doing a DIY Wedding, it is fun but you need family and friends to help craft with you. It is fun, bespoke and personal for your Wedding.

My top tips are -
  • Share your ideas with your suppliers as soon as you can.
  • Pick a simple colour scheme of four colours.
  • Have a critical planner with key dates on and plan,plan, plan!
  • Listen to other people's ideas they might be a good one
  • Visit one or two Wedding fairs only and go with what you love not what is in fashion.
  • Think of the details, such as special presents for people who helped you prepare the day.
  • Enjoy planning and preparing and go with your gut instinct!
I would love to hear your DIY Wedding stories too? 

BBFN,

My Biggest Sew Of All Time!

Wednesday 12 March 2014


Last year I walked into a tea shop and saw the most gorgeous two toned curtains up at the windows. 

They were velvet and oh my goodness...jacquard print too.

I was in love! I asked the owner about them and she said she got her inspiration from France.

That was it, I was on pinterest looking for gorgeous fabrics, drapes and patterns.

My husband, Mr.S. was pretty cool with me to go ahead and do what I wanted!I think after having Little L he was happy I wanted to sew again.I had visions for cream and gold drapes at our patio looking onto the garden.

Here we are 8 months later and the project is complete with some help from my Mum, loaning me the space to make them and for my husband for looking after Little L so much. 

But they are hanging and look devine.


I used a golden/green velvet and large repeat jacquard floral. The curtains both are one and a half times the width of the window. 


I used the velvet to wrap around the front and back of the curtains so they hand straight and the weight of the velvet is balanced front and back.

This project has been a labour of love and I am so proud of my biggest sew ever!

Happy Sewing!


T-Shirt Yarn Bracelet Tutorial

Tuesday 11 March 2014

Jewellery has gone big this season and on the high street it's all about chunky, friendship and pretty pastels. 

As it's kind of Spring outside already and I am not prepared with my wardrobe at all! 

This cute bracelet was just the thing to take my Winter wardrobe on step into the next season! I have tonnes of sewing on the go and this project was a nice quick project to complete.

I used Homecrafts t-shirt yarn which comes on a huge reel so you could make one for just about all your friends. I'm wearing mine with jeans but as it looks lacey you could wear it out for lunch or a night out!

It took about ten minutes whilst Little L was on nap time yesterday. Honestly try it, it grows sooo quickly you won't believe it. Plus the soft pink colour is really pretty for the Spring.  You will need -


 1. Make the magic ring and then on row 1 crochet 20 single crochet. (this was enough to fit around my wrist)

2. Turn and crochet 20 double crochet as your row 2 into the first single crochet.

3. At the end of the row cast off.

4. As the yarn is so chunky I created a loop between rows as I turned the crochet which can be used for the fastening loop.

5. Take your two ends and tie a knot around your bag charm clip and cut the excess . Stitch the ends into the crochet with a needle and thread.

And that's it! Your perfect leap into Spring!

Thank-you to Homecrafts for the perfect yarn to bring my wardrobe on step nearer to Springtime...

Happy Tuesday,


Moving On... a personal post

Monday 10 March 2014
Last week was a big week for us as we...

our first home together, hence the unplanned blogging break!

Even though moving on from your old home is a happy time, it also has lots of nostalgic memories, the Summer parties, happy holidays and getting our first little cat together.


Bradley posing for the camera, his first Winter with us.


This house was the first house Mr S. and I lived in together. We got married whilst living there, so it's on our marriage certificate and I fell pregnant with our first baby here too before we had Little L. We moved just before we lost the baby.
So this house was full of life changing events. Happy times, life changing times and times that have built us together. 
What is next for us...exciting times...

I am really looking forward to getting some DIY on in our family home, we need a new kitchen and maybe extend to make it a great room for living and eating / cooking in.

We need a lot of new curtains and the place needs freshening up this Spring too. Our family home is pretty modern but some aspects need to go and some look tired. Just the normal putting your stamp on kind of thing.

So looking forward, I am very much excited about more homemaking and less house selling!


Samantha x


Guest Post from Daire Paddy. Make These Pretty Business Cards

Sunday 2 March 2014


Find out how in this easy tutorial...


Last month at the Creative and Crafty Blogger Meet  (#ccbloggers)I co-hosted, I met the lovely Daire who blogs at Open Way Designs.


Daire's multimedia techniques are just awesome and I don't use awesome lightly! Read more about her work here.


So I am over the moon that Daire is guest posting this weekend; sharing her secret to making unique, pretty and 'on-of-a-kind' business cards.


Over to you Daire... 

A few weeks ago I met Sam at the fabulous #ccbloggers event that she co-hosted with Kat, and whilst there I engaged in some shameless self-promotion in the form of handing out my handmade business cards.  I promised Sam I’d share my super-quick, super-easy technique for making unique, one-of-a-kind business cards.


To make 16 cards you’ll need:

• 1 sheet of A4 card (I like cream)
•  A pair of scissors or a paper trimmer
•  A pencil, a ruler and a glue stick
•  A piece of colourful paper (I use scraps that I’ve covered in left over paint from other projects)
•  1 roll of decorative tape
•  A corner punch (optional)


First of all you want to divide up your sheet of card. I split it in half vertically and then trim 2cm off both edges. I then divide the remaining pieces into eight.


Once you’ve cut along all the lines, round off your corners with the punch (if desired – I just like how the round corners look.) If you don’t have a corner punch you could draw around a round lid and use scissors – just be aware that this will take a LONG time, and probably won’t look quite as neat.


Next, snip up your colourful piece of paper into strips – the size you go for is up to you, but mine are 3.5cm wide. Then you want to stick a strip of paper across each piece of card.


Finally, stick a strip of decorative tape across the centre of each card. If you don’t have an obscene collection of pretty tapes like I do, then you can always make your own by decorating strips of masking tape OR using thinner strips of a different paper.


If you want all of your information on the back then you can always print off labels to stick on, but I prefer to leave them blank. That way I can scribble on my contact info, depending on what I want to give people.


 I hope you’ve enjoyed this little tutorial – I’d love to see the quirky creative business cards you all come up with!


 Thank-you Daire, I'm inspired and I just cannot wait to make some of my own.


Enjoy the weekend!


Samantha x